
YouTube is the most popular video-sharing platform where users watch more than one billion hours of videos each day. Its reach is spread across the globe. It is one of the most influential and most loved social media platforms for videos, especially among the youth. Let’s know how to change video privacy settings on YouTube.
Here we provide you with the step-by-step guide to change video privacy settings on YouTube-
1: Sign in to the YouTube
2: Tap on Library and then on your videos.
3: Next to the video you want to change, tap on more and then on edit.
4: Tap on the Privacy setting, and choose between Public, Private, and Unlisted whichever you want to.
5: Press back. Tap the SAVE button present at the top and save the changes.
Here is how to change video privacy settings on YouTube
1: Sign in to YouTube Studio.
2: Select content from the left menu
3: Point towards the video you’d like to update. Select Live Tab to see your live uploads.
4: Click the down arrow under “Visibility” and choose Public, Private, or Unlisted.
5: Finally, click on Save Button.
How to Set Up YouTube Parental Controls
If your kids love streaming and watching videos on youtube it’s important for parents to establish a kid-safe friendly environment by enabling YouTube parental controls. Youtube makes this work very easy. Putting parental controls on YouTube is easier than you think. Once this parental control is installed and activated, you can relax and chill as the company’s strict content guidelines will prevent your child from seeing something he or she shouldn’t.
This Guide to YouTube Parental Controls will help you know how to filter the content preferences for your children so that they can only see the relevant content.
Use YouTube’s ‘Restricted’ Mode on Browsers
YouTube’s Restricted Mode that “uses signals such as video title, description, metadata, Community Guidelines reviews, and age restrictions to filter out the age-inappropriate content ”.It’s not as foolproof and a little questionable, but it’s worth a try as it is free.
Here’s how to do it:
- Access YouTube.com and sign in
- Click the “Settings” button present in the left sidebar
- Click the drop-down menu at the bottom of the page that reads: “Restricted Mode: Off.”
- Select “On” so that the Restricted Mode on this browser can be locked
- Click “Save.”
Repeat this with other browsers and computers. Also, don’t forget to log out of your YouTube and Google accounts when you finish. Otherwise, your precocious child may discover how to undo all your hard work and turn Restricted Mode off.
Update YouTube Permissions on Phones and Tablets
When you hand over your mobile phone or tablet to your child make sure Youtube Parental Control is also enabled on both the device’s browser and the respective YouTube app. For mobile browsers, follow the procedures outlined above. For the dedicated YouTube apps, the premise is the same:
iOS
- Click on your account button present at the top right corner
- Tap “Settings.”
- Click “Restricted Mode” Filtering.
- Turn “Restricted Mode” on.
Android
- Log in to your YouTube/Google account.
- Click on the “three-dot” icon. Select “Settings.”
- Select “Settings > General.”
- Turn “Restricted Mode” on.
Following our previous advice, ensure you sign out when you’re done.
Use the YouTube Kids App
For stricter controls, try the YouTube Kids app for iOS and Android phones and tablets. It’s safe, fun, interactive and, a kid-friendly interface that gives parents the opportunity to view channels and videos that have been reviewed by real people to be sure that their kids are watching the safe content. We especially like this feature, as it taps into a crowdsourced means of viewership rather than a robot. Age settings can also be changed within the app to allow older kids to view content they might be ready for but a younger child may not.
Turn on Google SafeSearch
Restricting youtube content will definitely help in filtering the content choices of your child but kids these days access mature material all over the internet. For this, you can turn on the “Safe Search” filter in any browser your child uses.
Here is how you can do it-
- Go to Google search engine
- Click “Settings” present at the bottom right corner
- Select “Search Settings.”
- Check “Turn on SafeSearch” and click “Lock SafeSearch.”
How to change the playlist privacy setting on YouTube
YouTube is one of the most popular platforms across the world to stream video content from all over the world. A playlist owner on youtube can make his or her playlist public, private, or unlisted. Though by default all playlists on youtube are marked public there are certain features available by which you can make it private as well.
You can change your YouTube playlist privacy setting by following some simple steps. But you have to enlist a number of reasons to change your YouTube playlist privacy. We are here to help you with the same. One thing to note here is that privacy settings for the playlist you have created are different from the playlist you have saved.
We here provide you with the step-by-step guide which you can follow to change the privacy for playlists you’ve created on YouTube-
How to change the privacy for playlists on YouTube
Note: In case if you’re in YouTube Studio, click Creator Studio Classic in the left menu to follow these steps.
Step 1: First you need to sign in to YouTube.
Step 2: Now you have to go to Creator Studio Classic.
Step 3: In the left menu, click Video Manager and then Playlists.
Step 4: Next to the playlist you wish to update, click Edit. (This will take you to the individual playlist where you’d like to manage)
Step 5: On the left side you will see a drop-down for Private, Public, or Unlisted. Choose any one of the options.
Another pattern is also available. The steps for the other pattern are as follows –
Step 1: First you have to sign in to YouTube.
Step 2: Next you have to go to your Library.
Step 3: After that, you have to select Individual Playlists.
How to change YouTube privacy for playlists you’ve saved
Here we provide you with a step-by-step guide that you can follow to change the privacy of playlists you’ve saved-
Step 1: First you have to sign in to YouTube.
Step 2: Then you have to click your profile picture
Step 3: Then click Settings.
Step 4: Now in the left menu, select Privacy.
Step 5: Now Turn on Keep all my saved playlists private.
How Can I Make My YouTube Channel Visible to Viewers?
When you create a new YouTube channel, it becomes public by default, and your channel’s homepage is visible to all the viewers. Your videos will remain hidden unless you slow the public viewing. If you created your YouTube account prior to October 2012, your entire channel may be hidden, due to Google’s old privacy rules. In this case, you can manually convert it to a public channel.
During the upload process, google allows you to set the privacy setting of each individual video. You can set the privacy settings as Public, Private or Unlisted. The last two options available prevent the video from showing up on your channel. Those options make your videos available only to you and others selected by you. After you upload the video, you can change its privacy settings from your channel’s video managing page.
If your channel was unlisted before Google changed its privacy policy, you must change it to Public from your account settings. For this, you have to Click your Google profile picture at the top of the page and select “YouTube Settings.” Click the “Advanced” link on the Overview screen, and then click “Make This Channel Public.”
Also Read:
How to Trim a Video on Windows and Mac without Losing Quality
Best Subtitle Maker – How to Make Subtitle in Video
最简单高效的字幕制作软件:免费编辑字幕文本、添加字幕样式
Gihosoft Free Lossless Video Cutter
The easiest two-in-one free video trimmer and joiner software
1 Cut video and audio without decreasing the quality
2 Easy to use, fast import and quick output
3 Accurately control every second of the range for cutting
4 Support various video and audio formats
5 100% clean and free video cutter

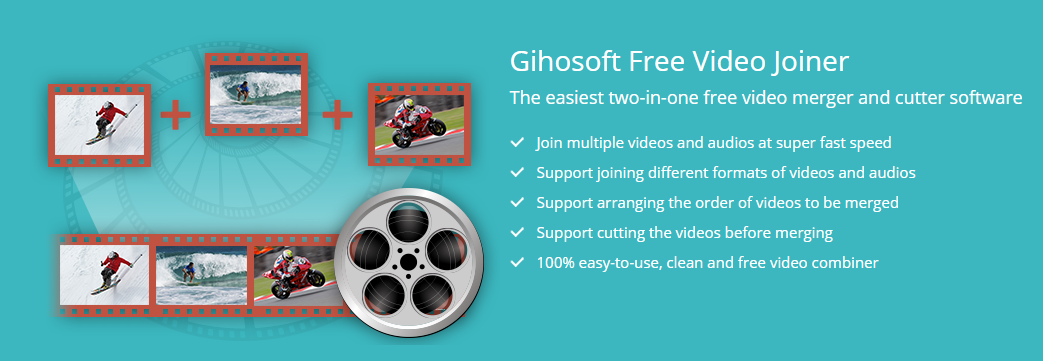
Gihosoft Free Video Joiner Software
The easiest two-in-one free video merger and cutter software
1 Join multiple videos and audios at super fast speed
2 Support joining different formats of videos and audios
3 Support arranging the order of videos to be merged
4 Support cutting the videos before merging
5 100% easy-to-use, clean and free video combiner
Comments
Post a Comment