Upload photos to Instagram from a PC with these quick tricks

It's possible to upload photos to Instagram from a PC, if you know the right tricks. It's very handy, allowing you to make tweaks using a free photo editor designed for desktops rather than struggling with mobile apps.
Instagram makes it surprisingly hard to upload photos from your desktop – there's no way to do it using the official app for Windows 10, or the Instagram website. There's no Instagram app for macOS either.
That's a nuisance – particularly if you want to post photos you’ve taken with a digital camera rather than a smartphone, or you want to edit your pictures and videos using desktop software before uploading them.
Thankfully there are a couple of handy ways to get around it and upload photos to Instagram from your PC or Mac. All you need is a little free software.

Method 1: Vivaldi

Image credit: TechRadar
1. Get Vivaldi
The super-customizable web browser Vivaldi offers the quickest and easiest way to upload photos to Instagram from a PC or Mac. It does this by running the mobile version of Instagram's website in a web panel.
The super-customizable web browser Vivaldi offers the quickest and easiest way to upload photos to Instagram from a PC or Mac. It does this by running the mobile version of Instagram's website in a web panel.
Download and install Vivaldi, then either run through the wizard to import bookmarks and set your preferences, or click 'Skip all' and continue with the browser's default settings.
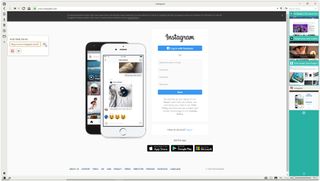
Image credit: TechRadar
2. Create a web panel
Navigate to www.instagram.com, then click the plus icon (Add Web Panel) on the left-hand side of the browser interface. The URL will be filled in automatically, so all you have to do is click the plus again.
The mobile version of Instagram will now appear in a sidebar on the left-hand side of the browser, and will stay there as you browse other sites. Log into your account, then resize the sidebar until the mobile site fits in comfortably.
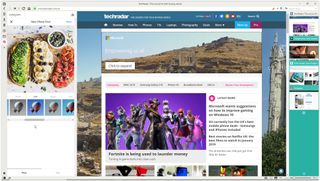
Image credit: TechRadar
3. Upload to Instagram
Click the plus icon at the bottom of the website to choose a photo from your PC or Mac, apply filters, add a caption and tags, and upload it to your account.

Method 2: BlueStacks App Player
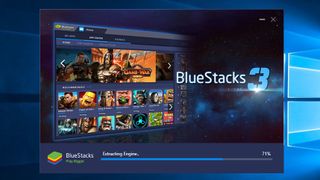
Image credit: TechRadar
1. Get BlueStacks App Player
The Instagram app for Android is superb, and you can run it on your desktop using free Android emulator BlueStacks App Player, enabling you to upload photos to Instagram from your PC or Mac.
Download and install BlueStacks, then wait a few minutes while the engine starts for the first time. Dismiss the tutorial using the cross at the top right, make sure the correct language is selected and tap the arrow button.

Image credit: TechRadar
2. Log into your Google account
Click ‘Continue’, then log in using your Google account. Review the terms of service and, if you agree, click ‘OK’.
The next checkboxes are completely optional; if you’re only using BlueStacks to upload to Instagram, feel free to uncheck them all. Click the Next arrow, then enter your name (it'll only be used to personalize some apps).
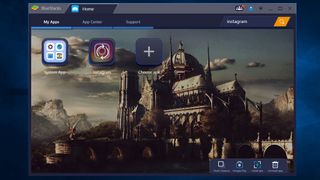
Image credit: TechRadar
3. Install the Instagram app
You'll now see a version of the Google Play Store. Search for Instagram (the search bar is in the top right), select the official app when it appears and click Install. The app will request access to information including your contacts and location. If that's OK with you, click 'Accept'.
After a moment, the Instagram icon will appear under the My Apps tab. Click it once to launch it. Image credit: TechRadar
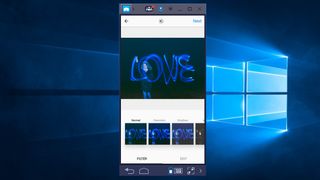 Image credit: TechRadar
4. Upload, apply filters and share
BlueStacks will change to the size and shape of a vertically-oriented smartphone. Sign into your Instagram account with your usual details (the login link is at the bottom). Your Instagram feed will appear as it would on a phone.
Click the plus icon at the bottom, then select 'Gallery'. Click the 'Gallery' drop-down menu at the top left and select 'Other', then click 'Pick from Windows'. Find the photo you want to upload, select it and click 'Open'.
You can now crop the picture, add filters and a caption, and share it with your followers via all the usual social networks.
Must Check Out Posts:
Erase unwanted objects and perfect your amazing photos!
Remove objects from photos with Photo Eraser is almost as easy as taking a shot. Now you can use this tool to erase undesirable objects from your pictures, such as tourists, watermarks, logos, texts, blemishes and other unwanted things without real photo-editing skills required at all.

The most powerful and professional data recovery software for Android that can restore deleted or lost contacts, photos, videos, audios, SMS, call logs, WhatsApp chat, Viber messages from any Android devices due to accidental deletion, virus attack, formatting. It supports all popular Android smartphones and tablets like Samsung, HTC, LG, Huawei, Motorola, Nexus, etc.

wow, this is nice it has actually been long I used bluestacks. thanks for sharing.
ReplyDelete